Anime Pipeline In A Real Studio
Animation is known as one of the most expensive mediums in the film industry, not just for its enormous budget, but for the sheer amount of time and manpower it demands. Maybe you're looking to start a journey into animation but aren't sure where to begin. Or maybe you're simply curious about the process behind those moving drawings. Either way, this blog is here to walk you through it.
Before Discovering the Pipeline
Western animation and Japanese anime follow different production pipelines, though the two still resemble each other in several ways. Nowadays, the global animation industry has upgraded production with new technologies like CGI, hybrid workflows and other methods to optimize both process and outcome. If you want to explore this animation evolution further, we covered the full history here.
Back to the animation pipeline. At Otsu Labs, we build on the Japanese animation pipeline as our foundation, then adjust it to fit our own studio workflow. This means everything we share below reflects our personal approach, not a universal standard that applies to every studio. Our goal with this topic is simple: help newcomers to the animation industry, or anyone curious about the process behind anime and animation, understand how things actually work behind the scenes. So feel free to take this as an add-in knowledge about how the animation studio really works out there.
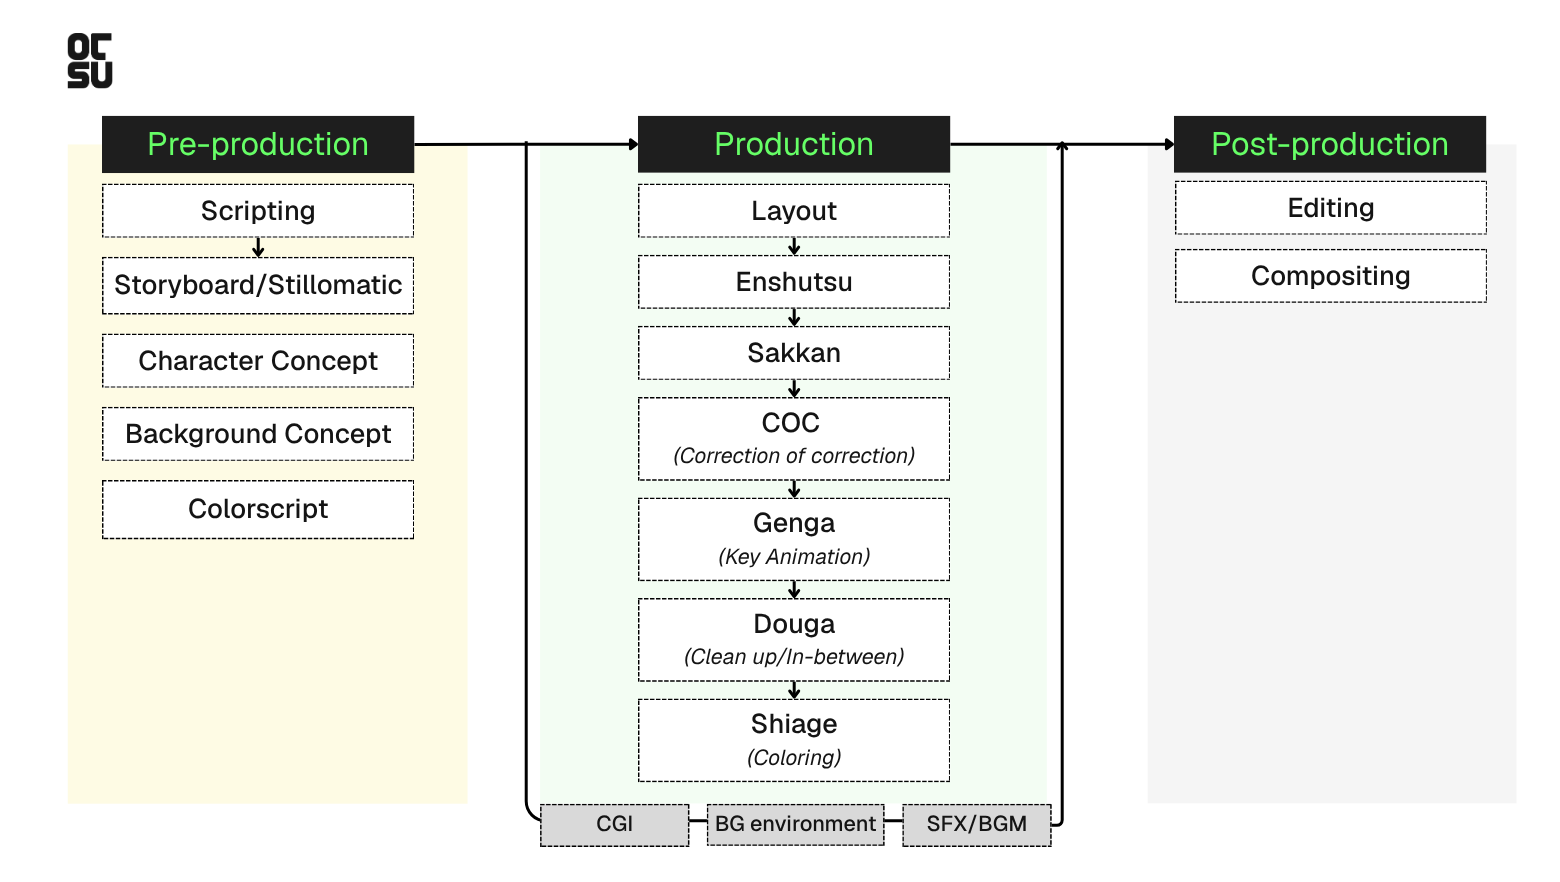
In this blog, Otsu Labs will cover the whole process of making an animation, including 3 stages: Pre-production - Production - Post-production. Now, let’s go through step-by-step.
Pre-production
Pre-production is the phase where your entire film gets scripted, concept developed, decided and locked on paper before a single frame is produced. In a real animation studio, no one animates entirely until the whole film before pre-production is complete.
Think of it this way: pre-production is the blueprint. Production is the construction. You cannot build without a blueprint, and changes during construction are insanely expensive.
So, what do we do in pre-production?
1. Script
First and foremost, we need a story. If you are working with a client/partner you will receive the brief of what they want to do in the animation, it can also include client’s resources like: (References, character design, script, moodboard,...)
Based on their desired content, we will develop (or rewrite) a detailed script to clarify how the story starts, how it’s going and closing. Then, according to the story, we will create a director's treatment to see how the animation should be executed.
- In-charged role: Director, Script writer, Client
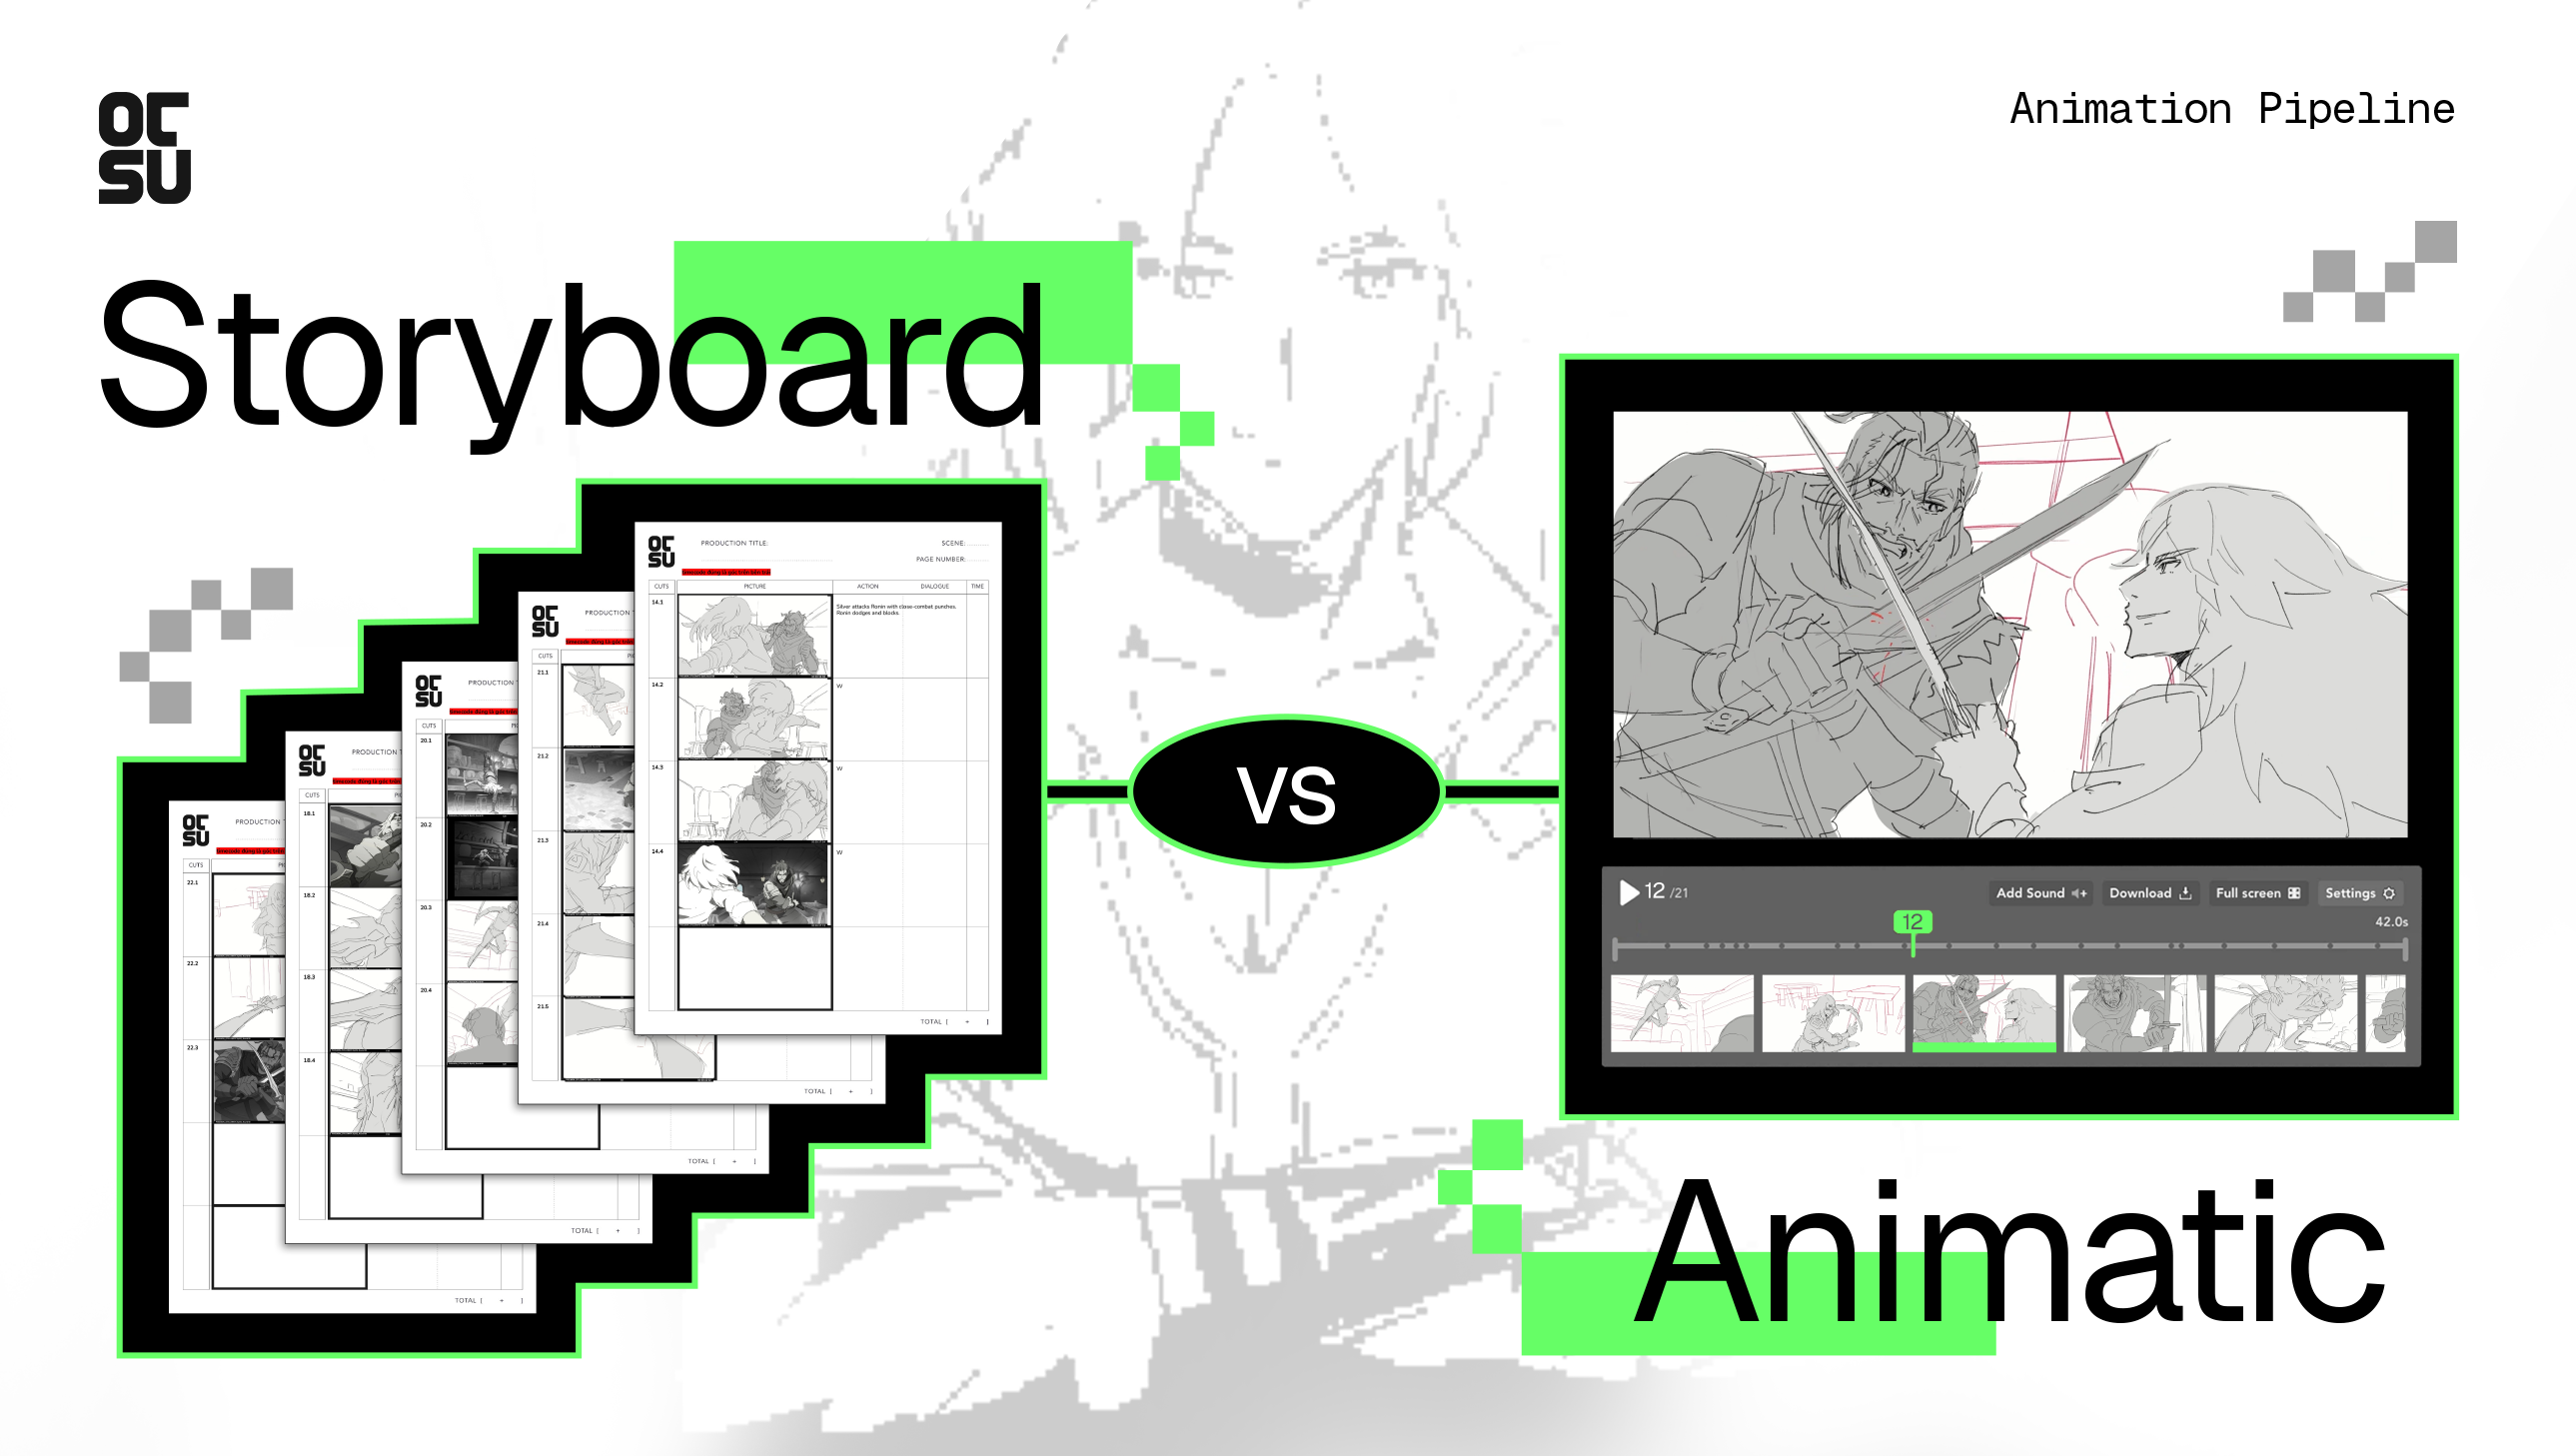
2. Storyboard/Stillomatic
Storyboards define camera angles, character staging and how the action flows. It's the first time your story becomes visual.
Note: You don't need to be a perfect artist. Storyboard drawings are rough and fast, the clarity of the movement matters more than beauty at this stage.
If you use drawing from a storyboard and combine it as a video so you can see the rough story flow, it’s called stillomatic.
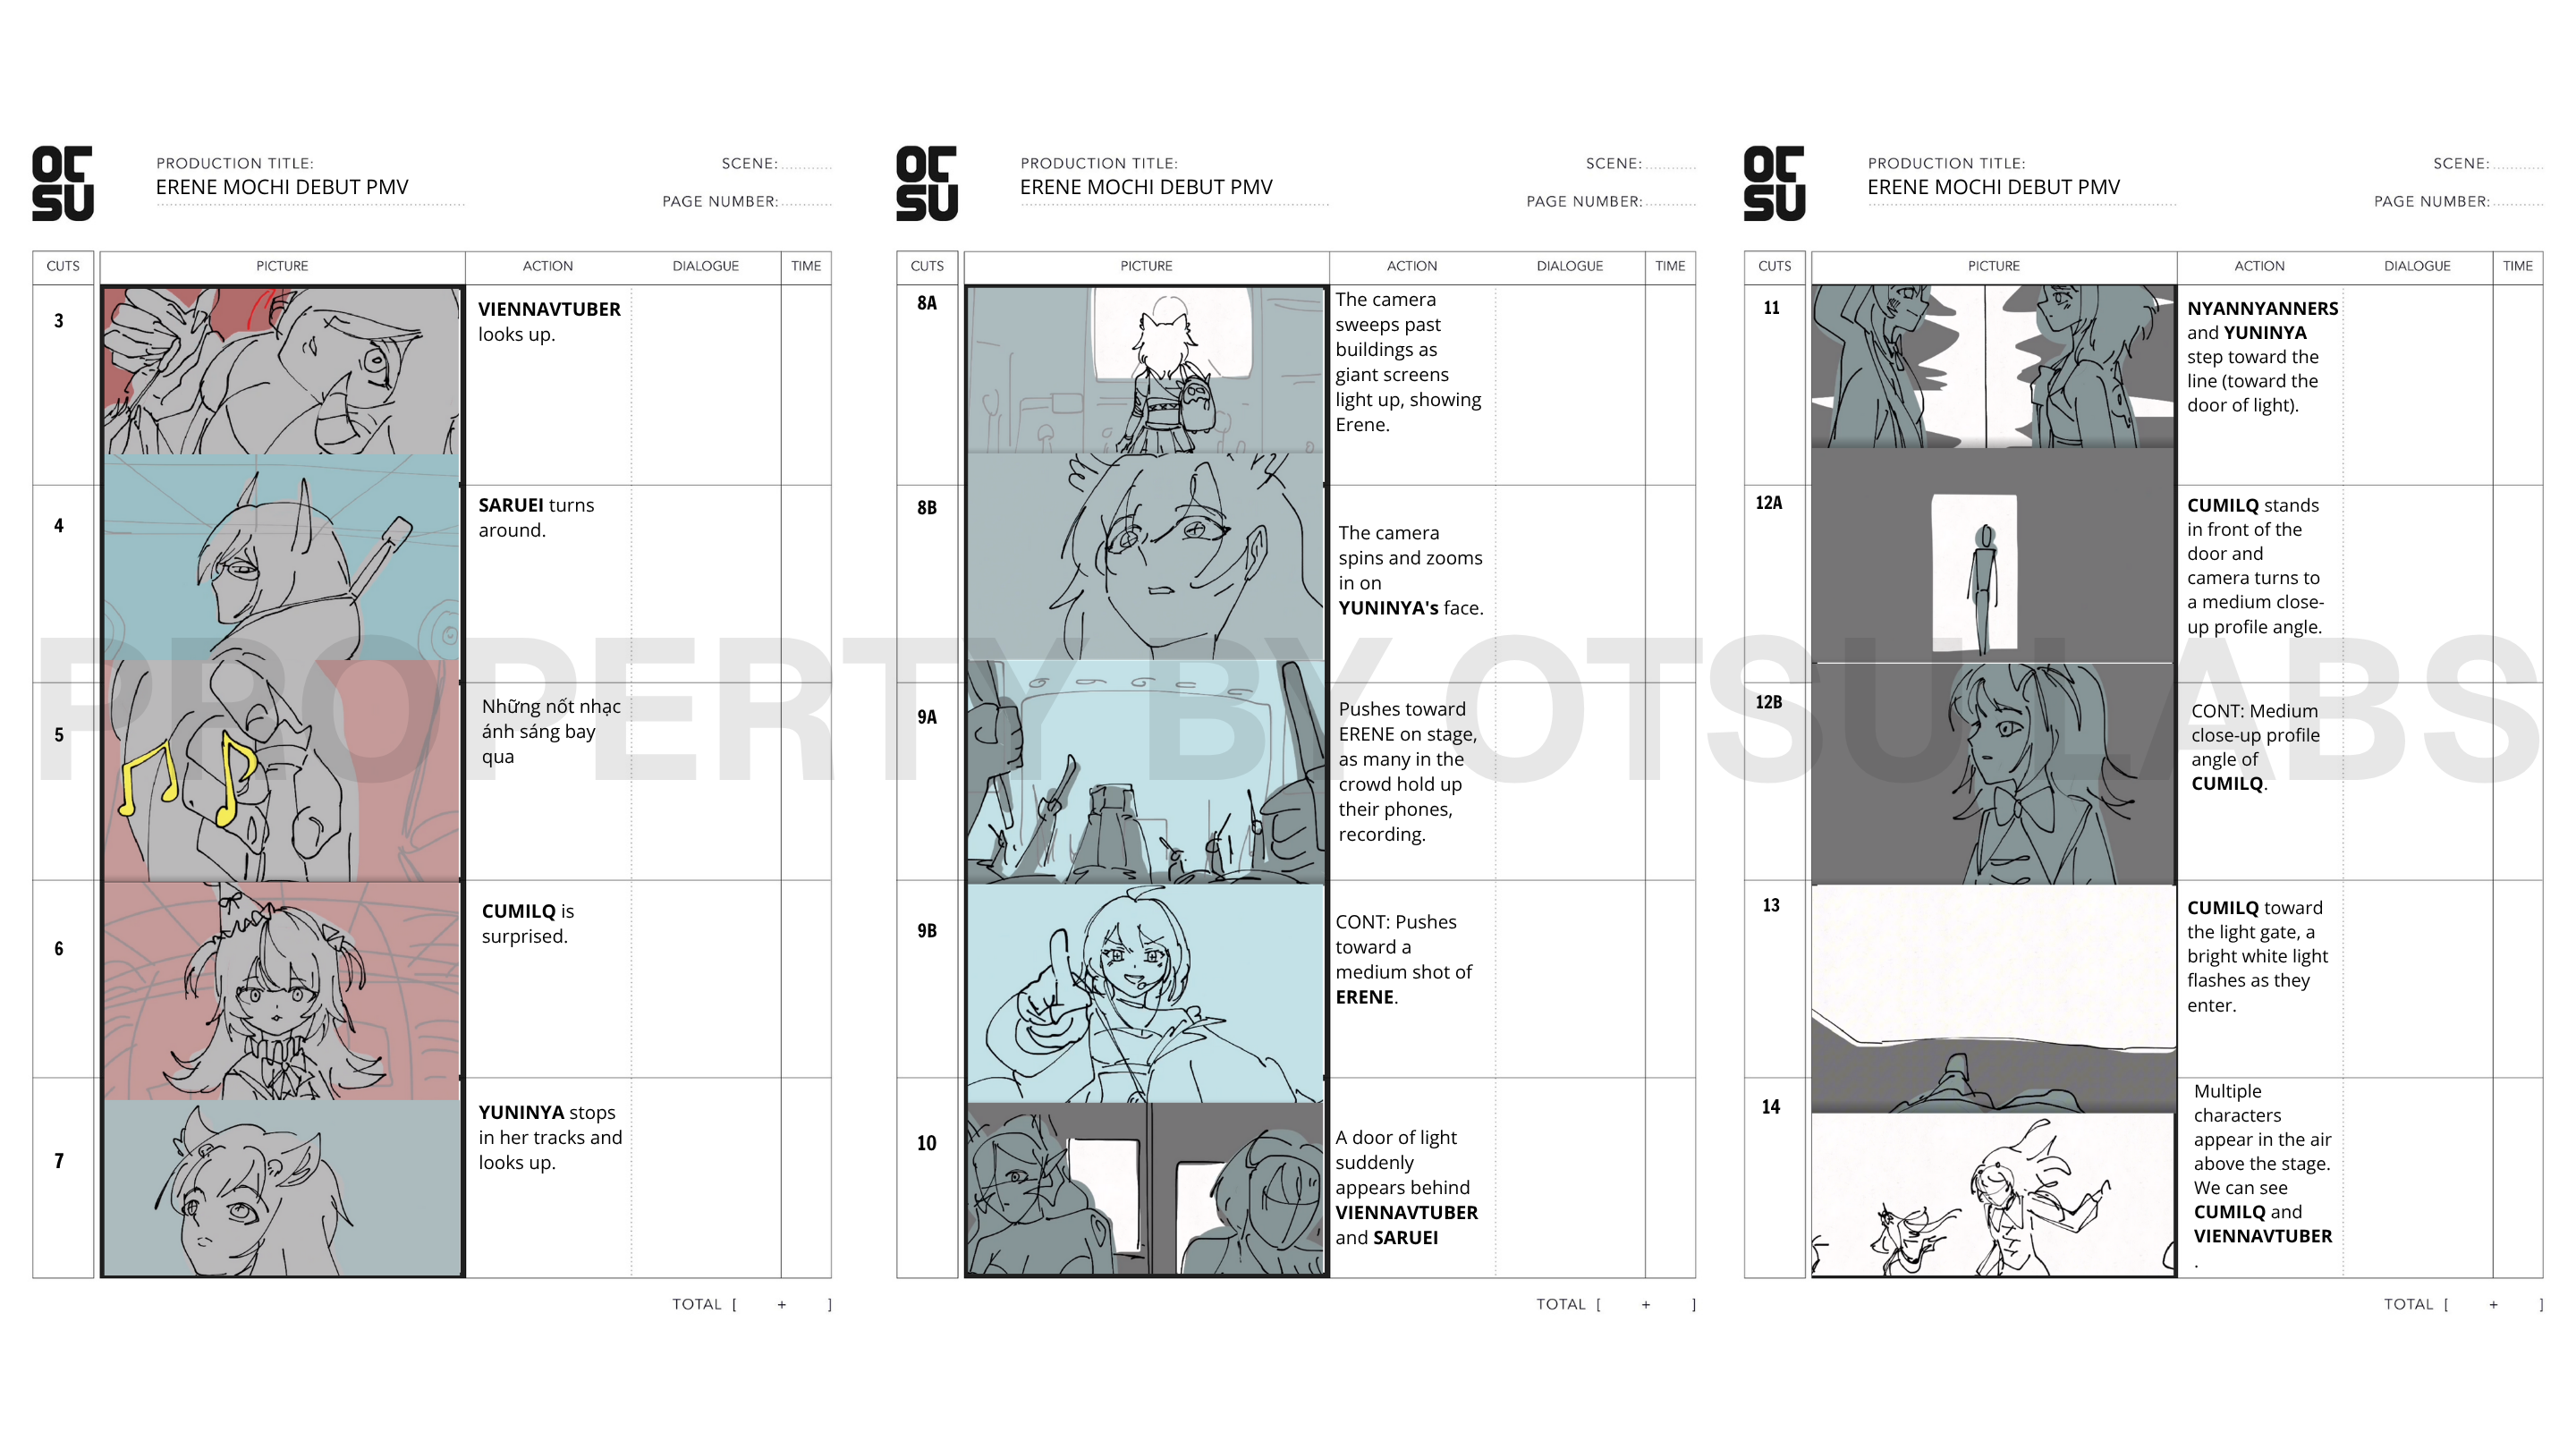
Sometimes depending on the project requirement, we might have an animatic. It’s quite similar with stillomatic but it shows clearer the movement, especially with action sequences. An animation lets you feel the pacing of the film for the first time. This is where you catch timing problems before they're animated.
- In-charged role: Director, Storyboard artist, Client
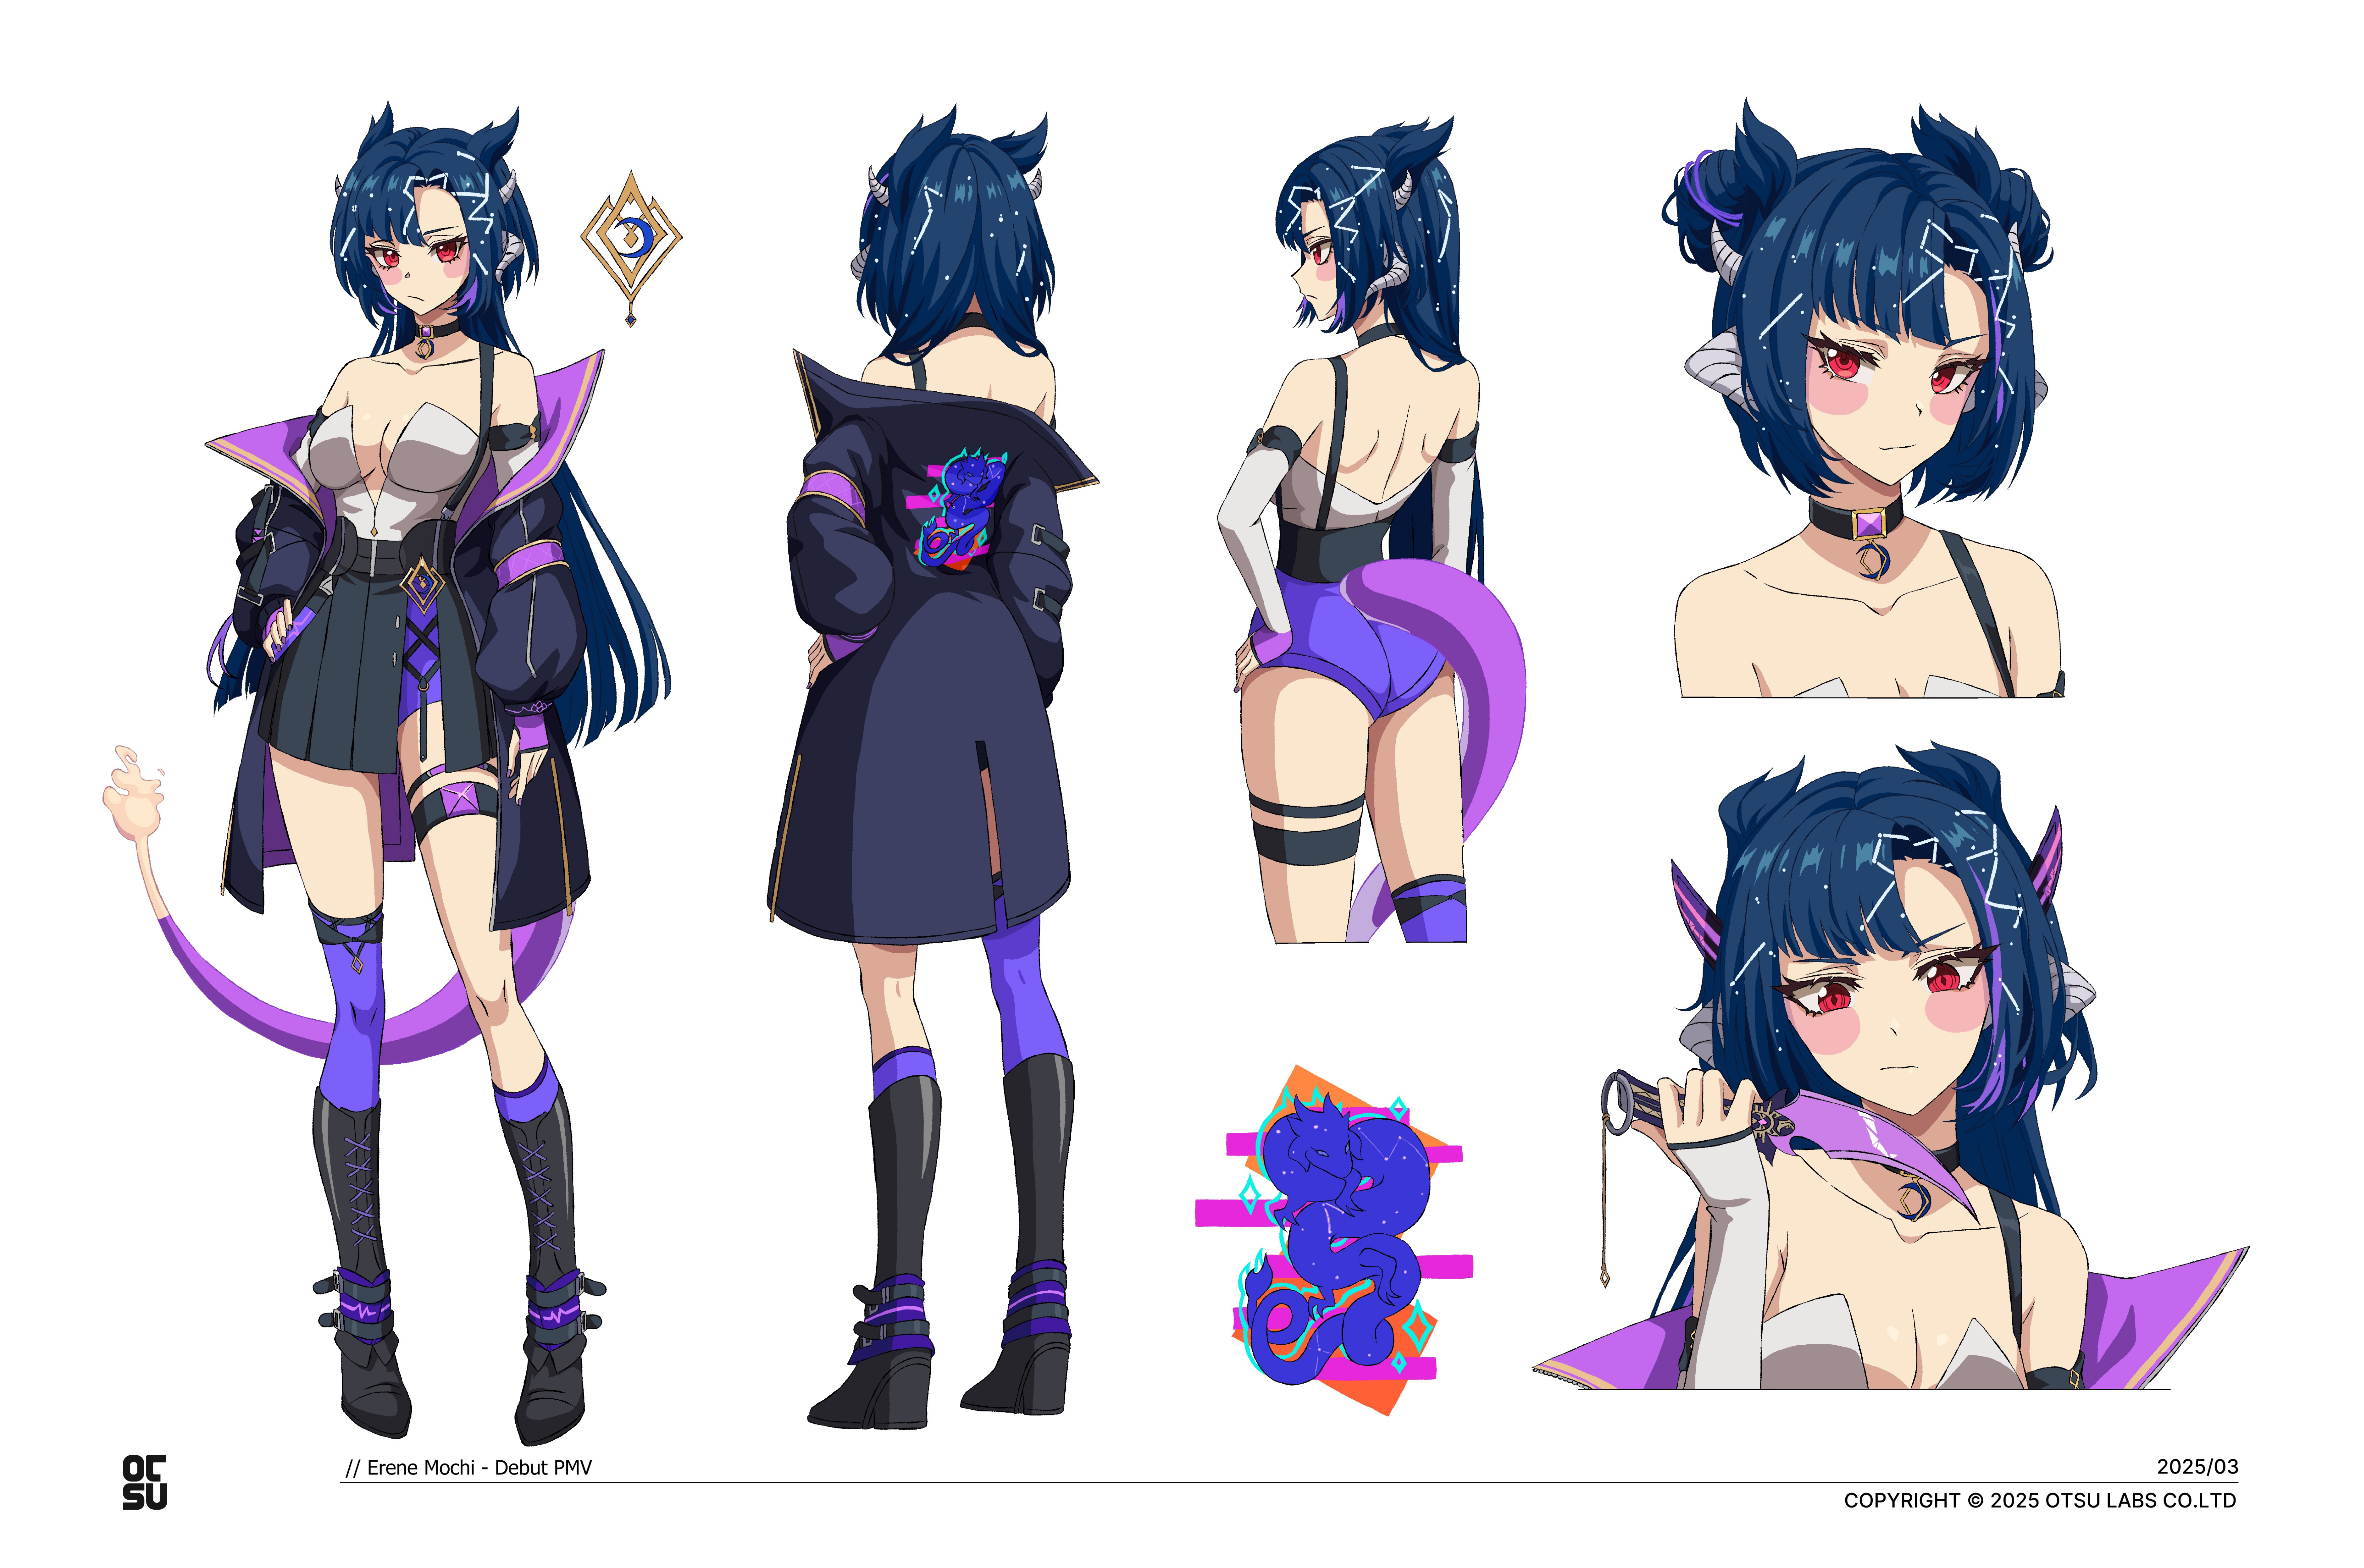
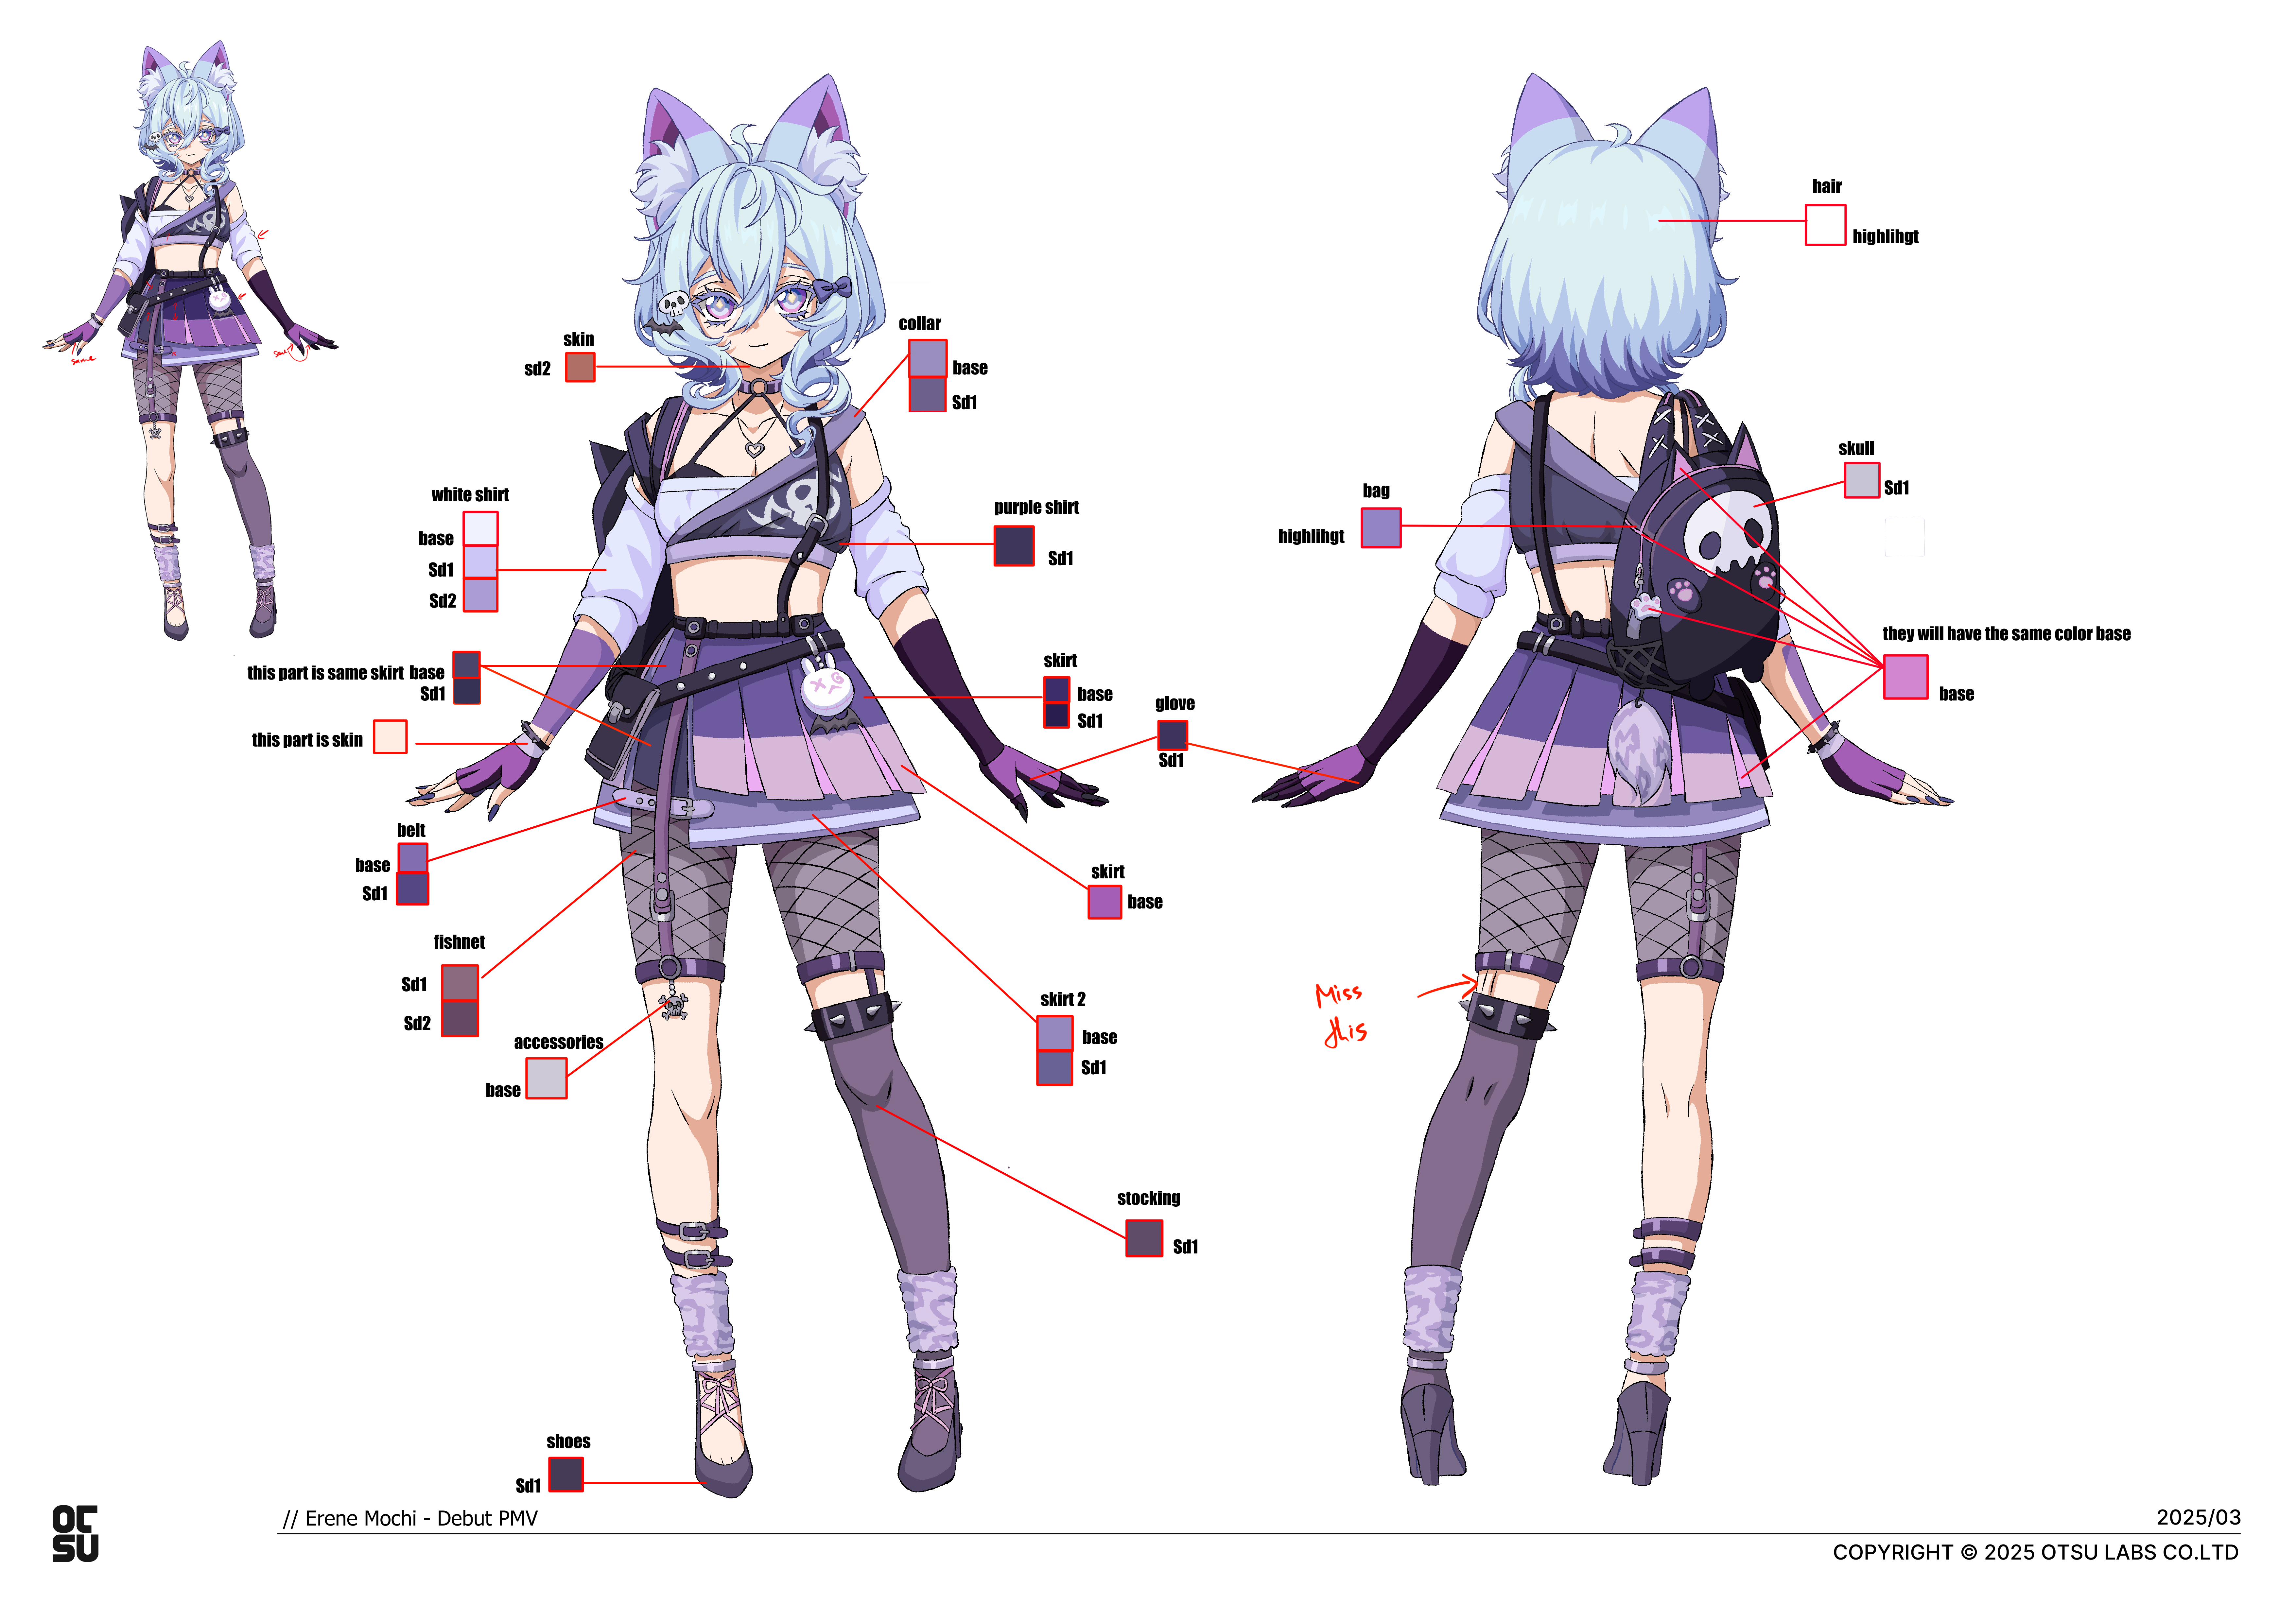
3. Concept Character - Settei (設定)
Every character in the film gets fully designed before animation begins: their look, proportions, costume, personality cues/emotion expression, and how they appear from multiple angles.
This becomes the reference every animator follows and also the blueprint for Sakkan to adjust the character proportion during the production.
- In-charged role: Art Director, Concept Artist, Client
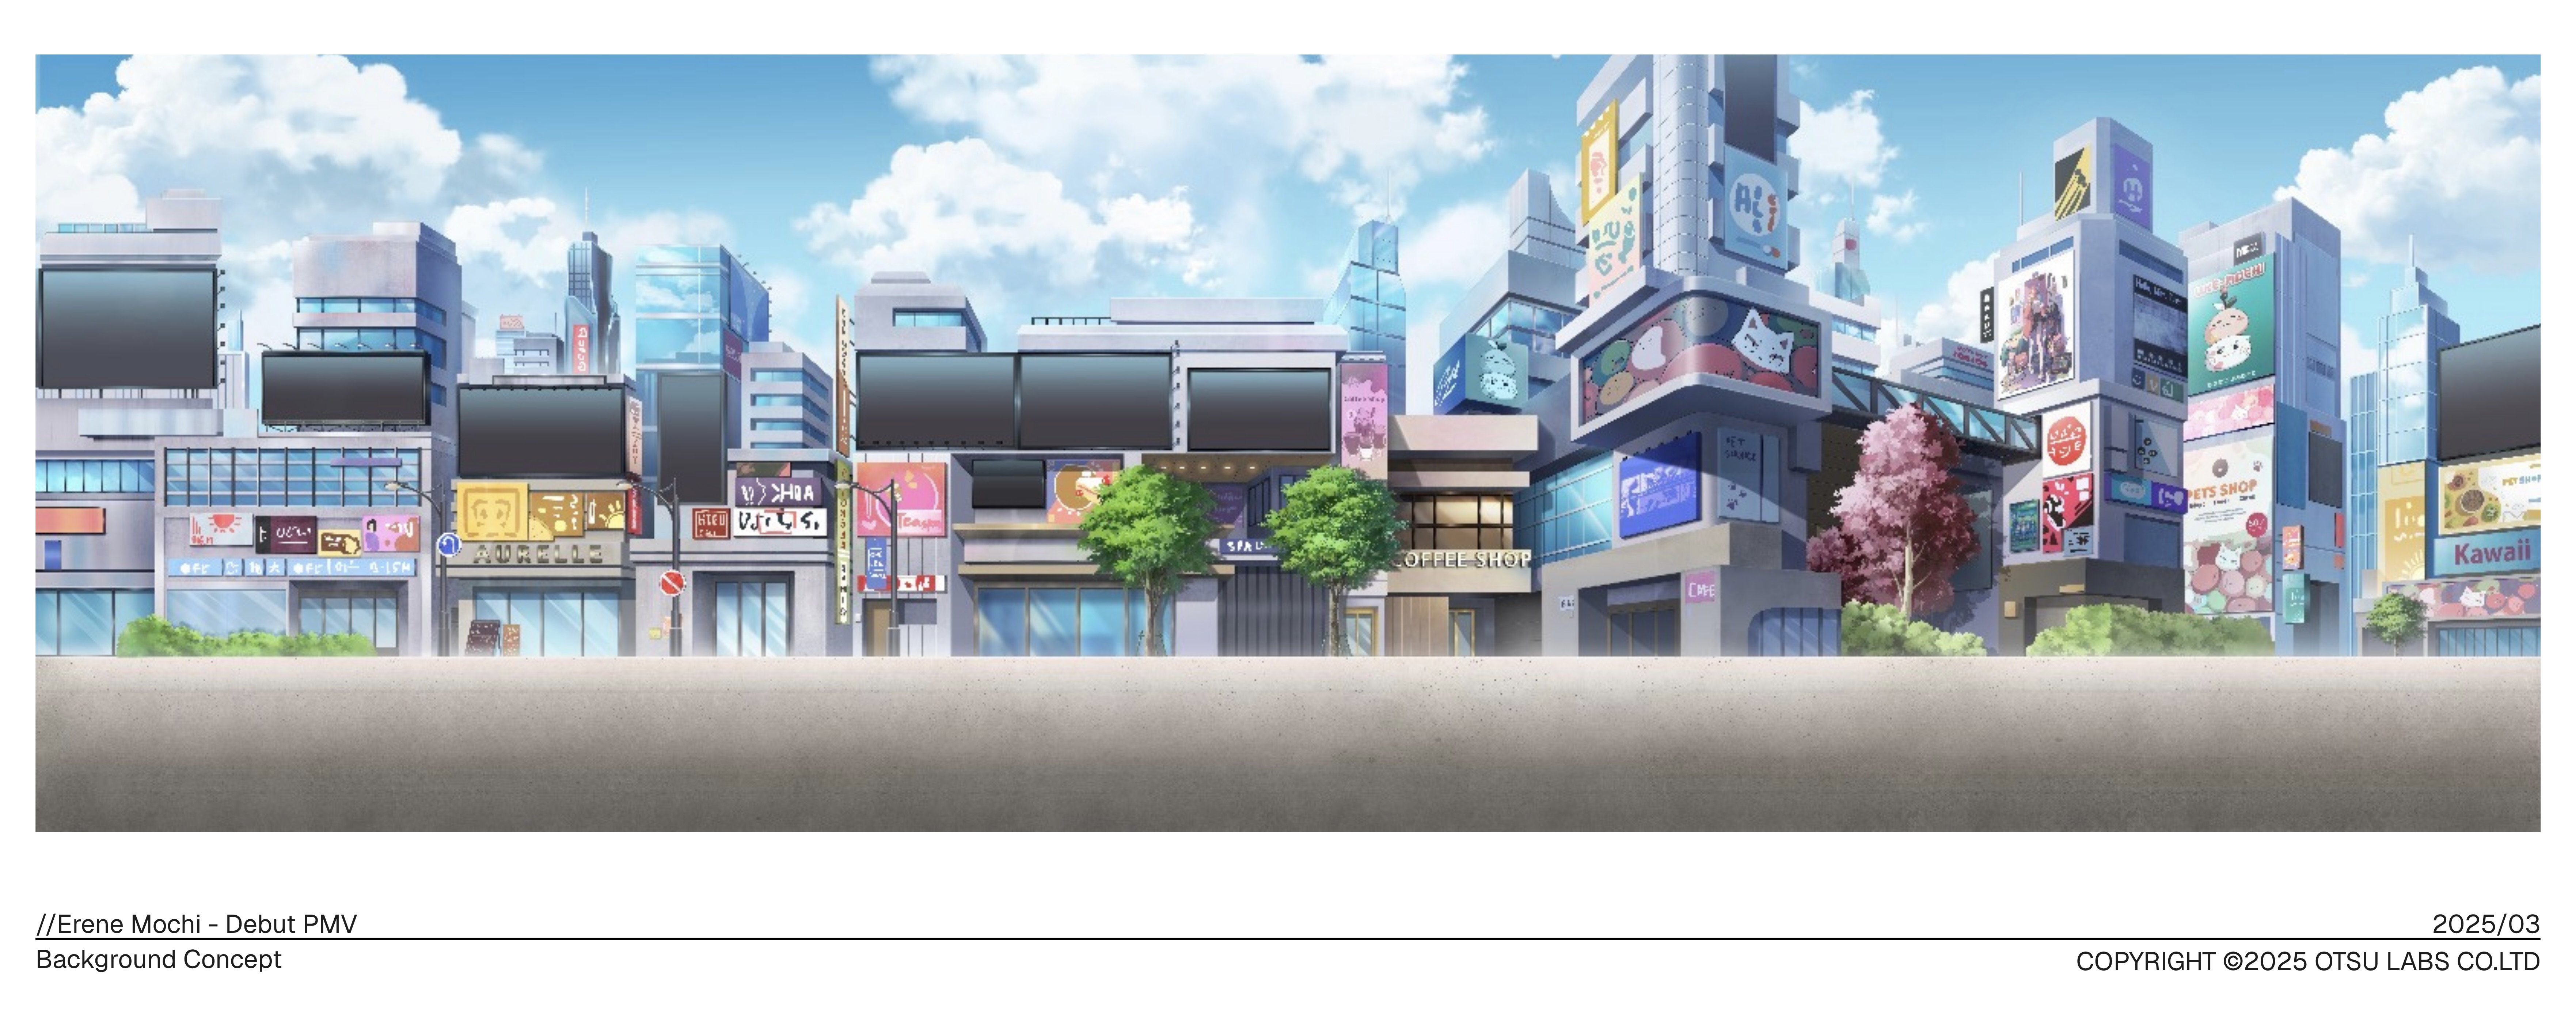
4. Concept Background
Every location, environment and space in the film gets designed. Where does the story take place? What does it look like? What's the visual language of this world? Background designers answer all of these. This stage also decide which type of background would be used: 2D or 3D. More than a decoration, the background tells the audience where and when they are, and they set the emotional context of every scene.
- In-charged role: Art Director, Background Artist, Director
5. Colorscript
Every color speaks for itself. The color script maps the emotional journey of the whole film through color palettes, scene by scene.
- In-charged role: Art Director, Colorist, Director
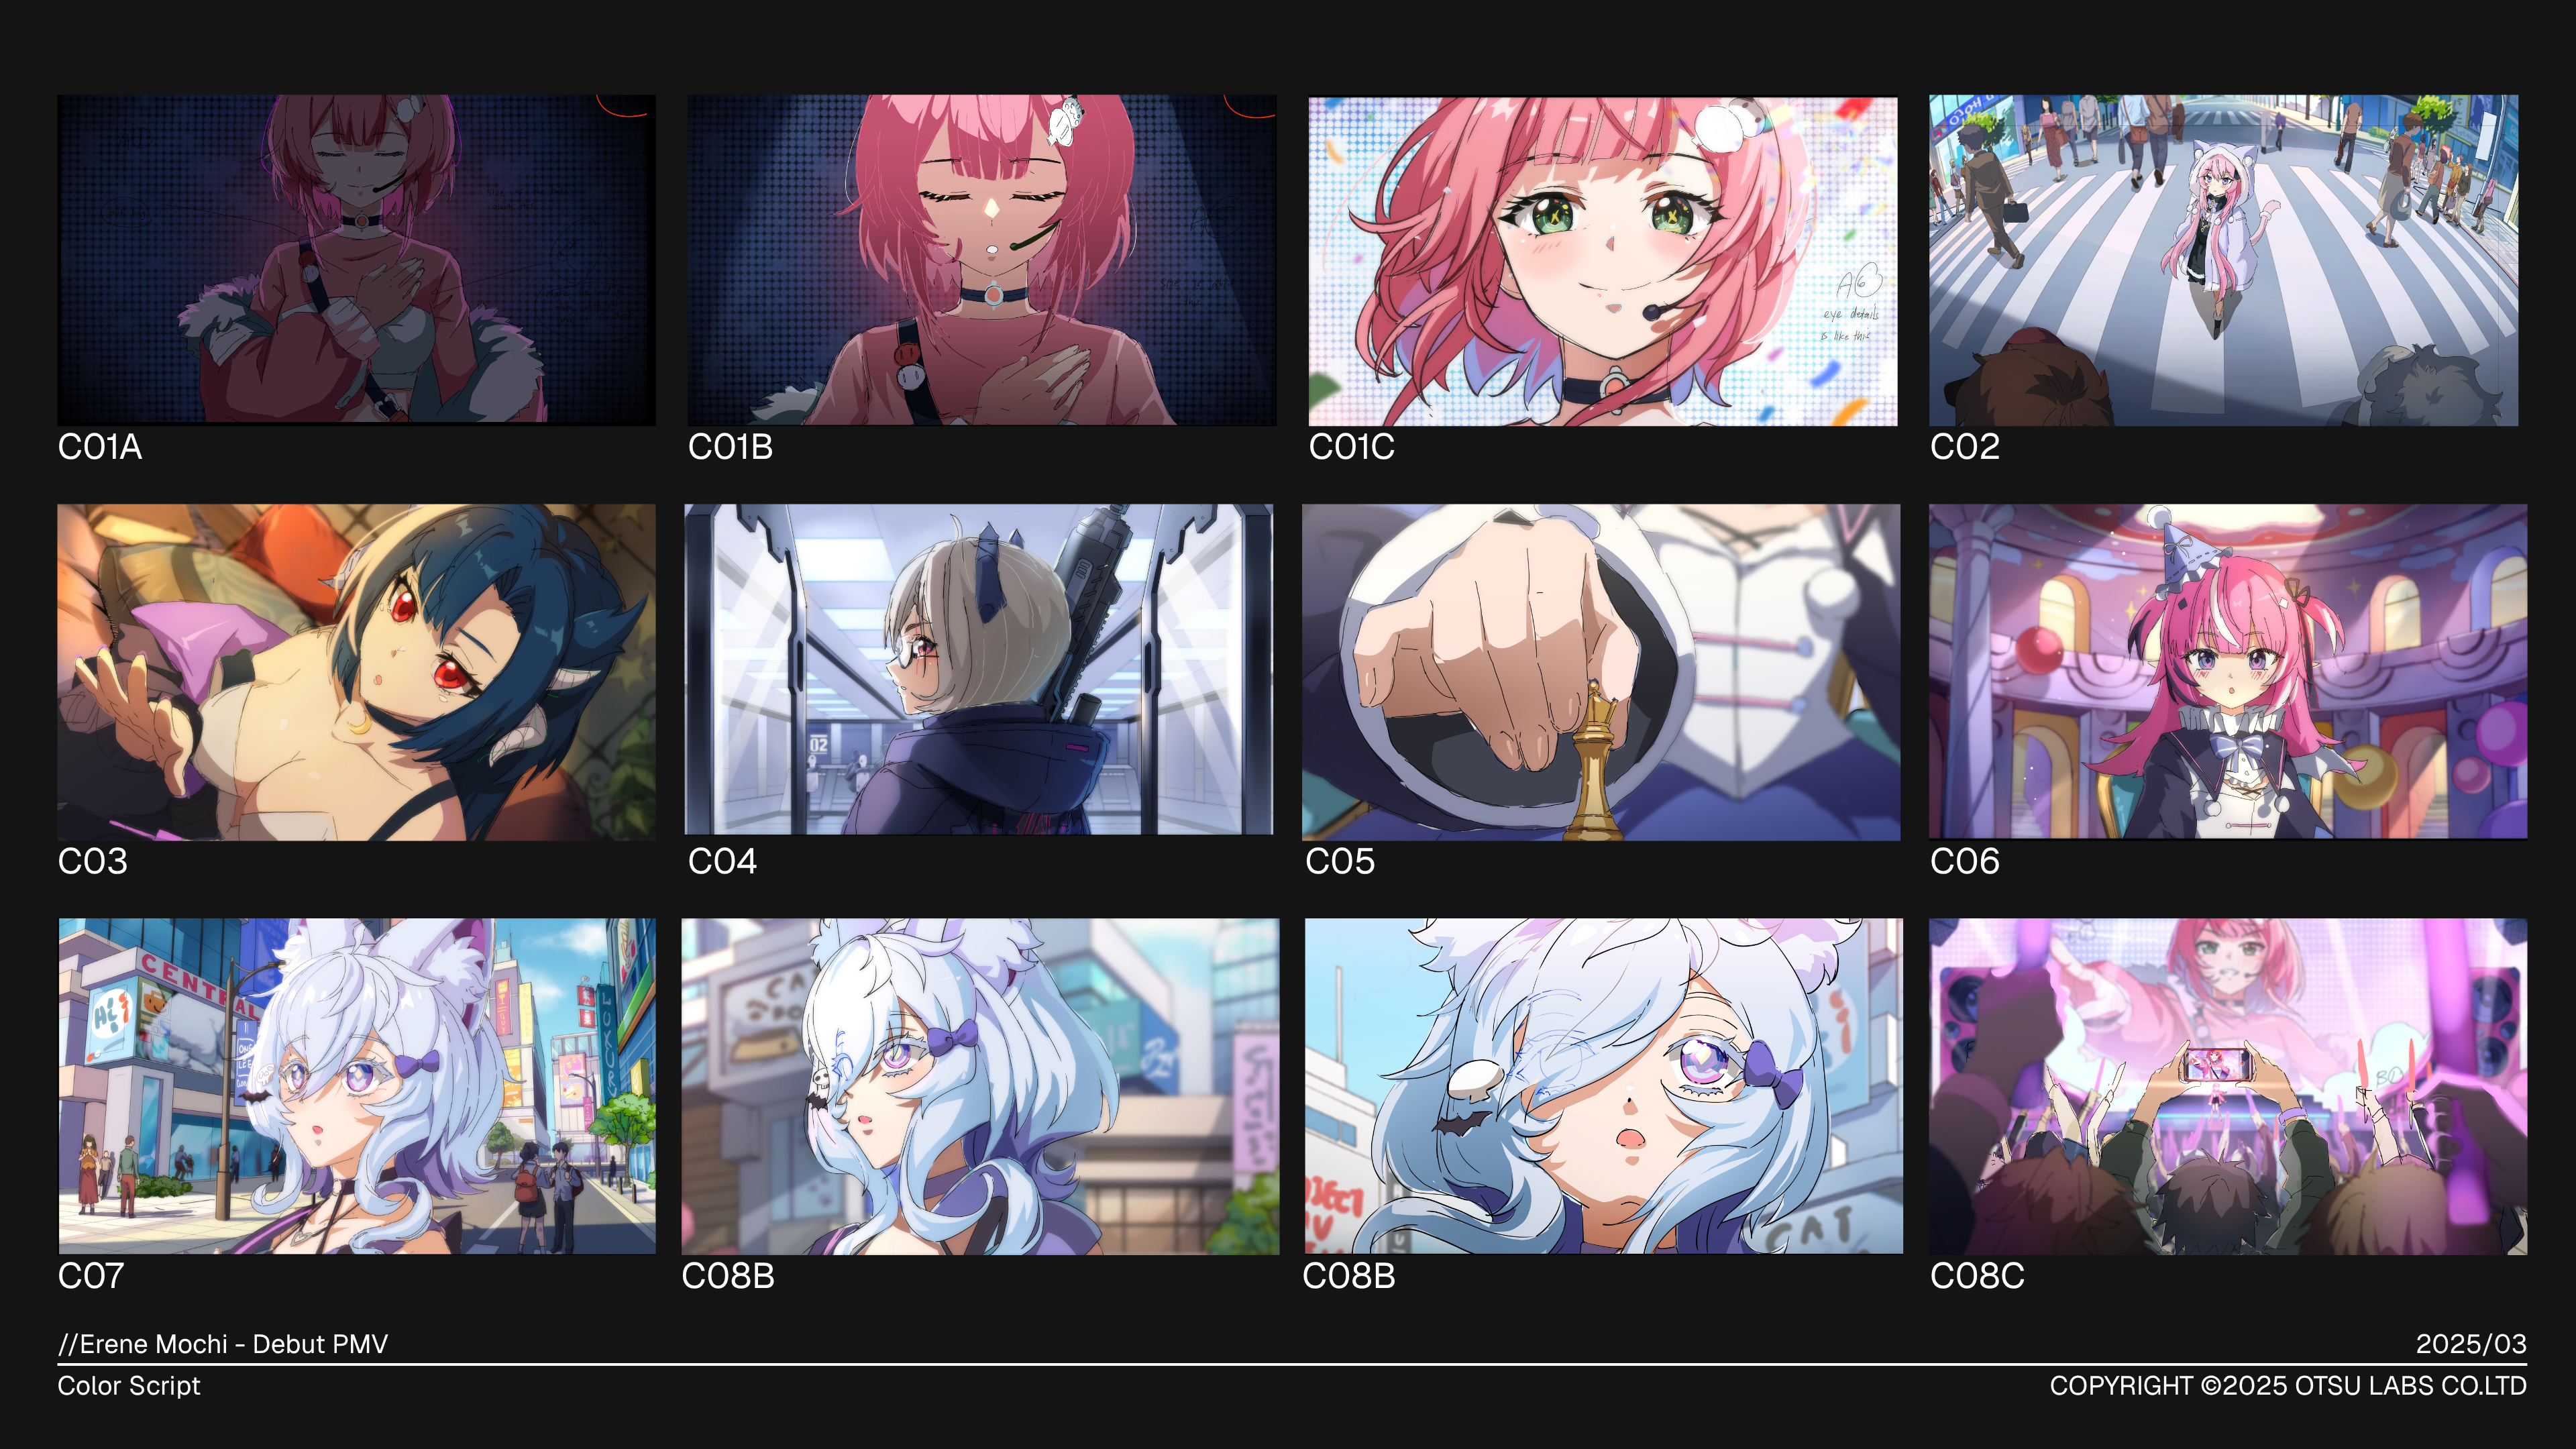
The goal of pre-production is to make every decision before they become expensive. Changing a script takes 10 minutes, meanwhile, changing an animated scene takes weeks. We often say that "You should do your editing in pre-production, not on the post-production".
Production
1. Layout
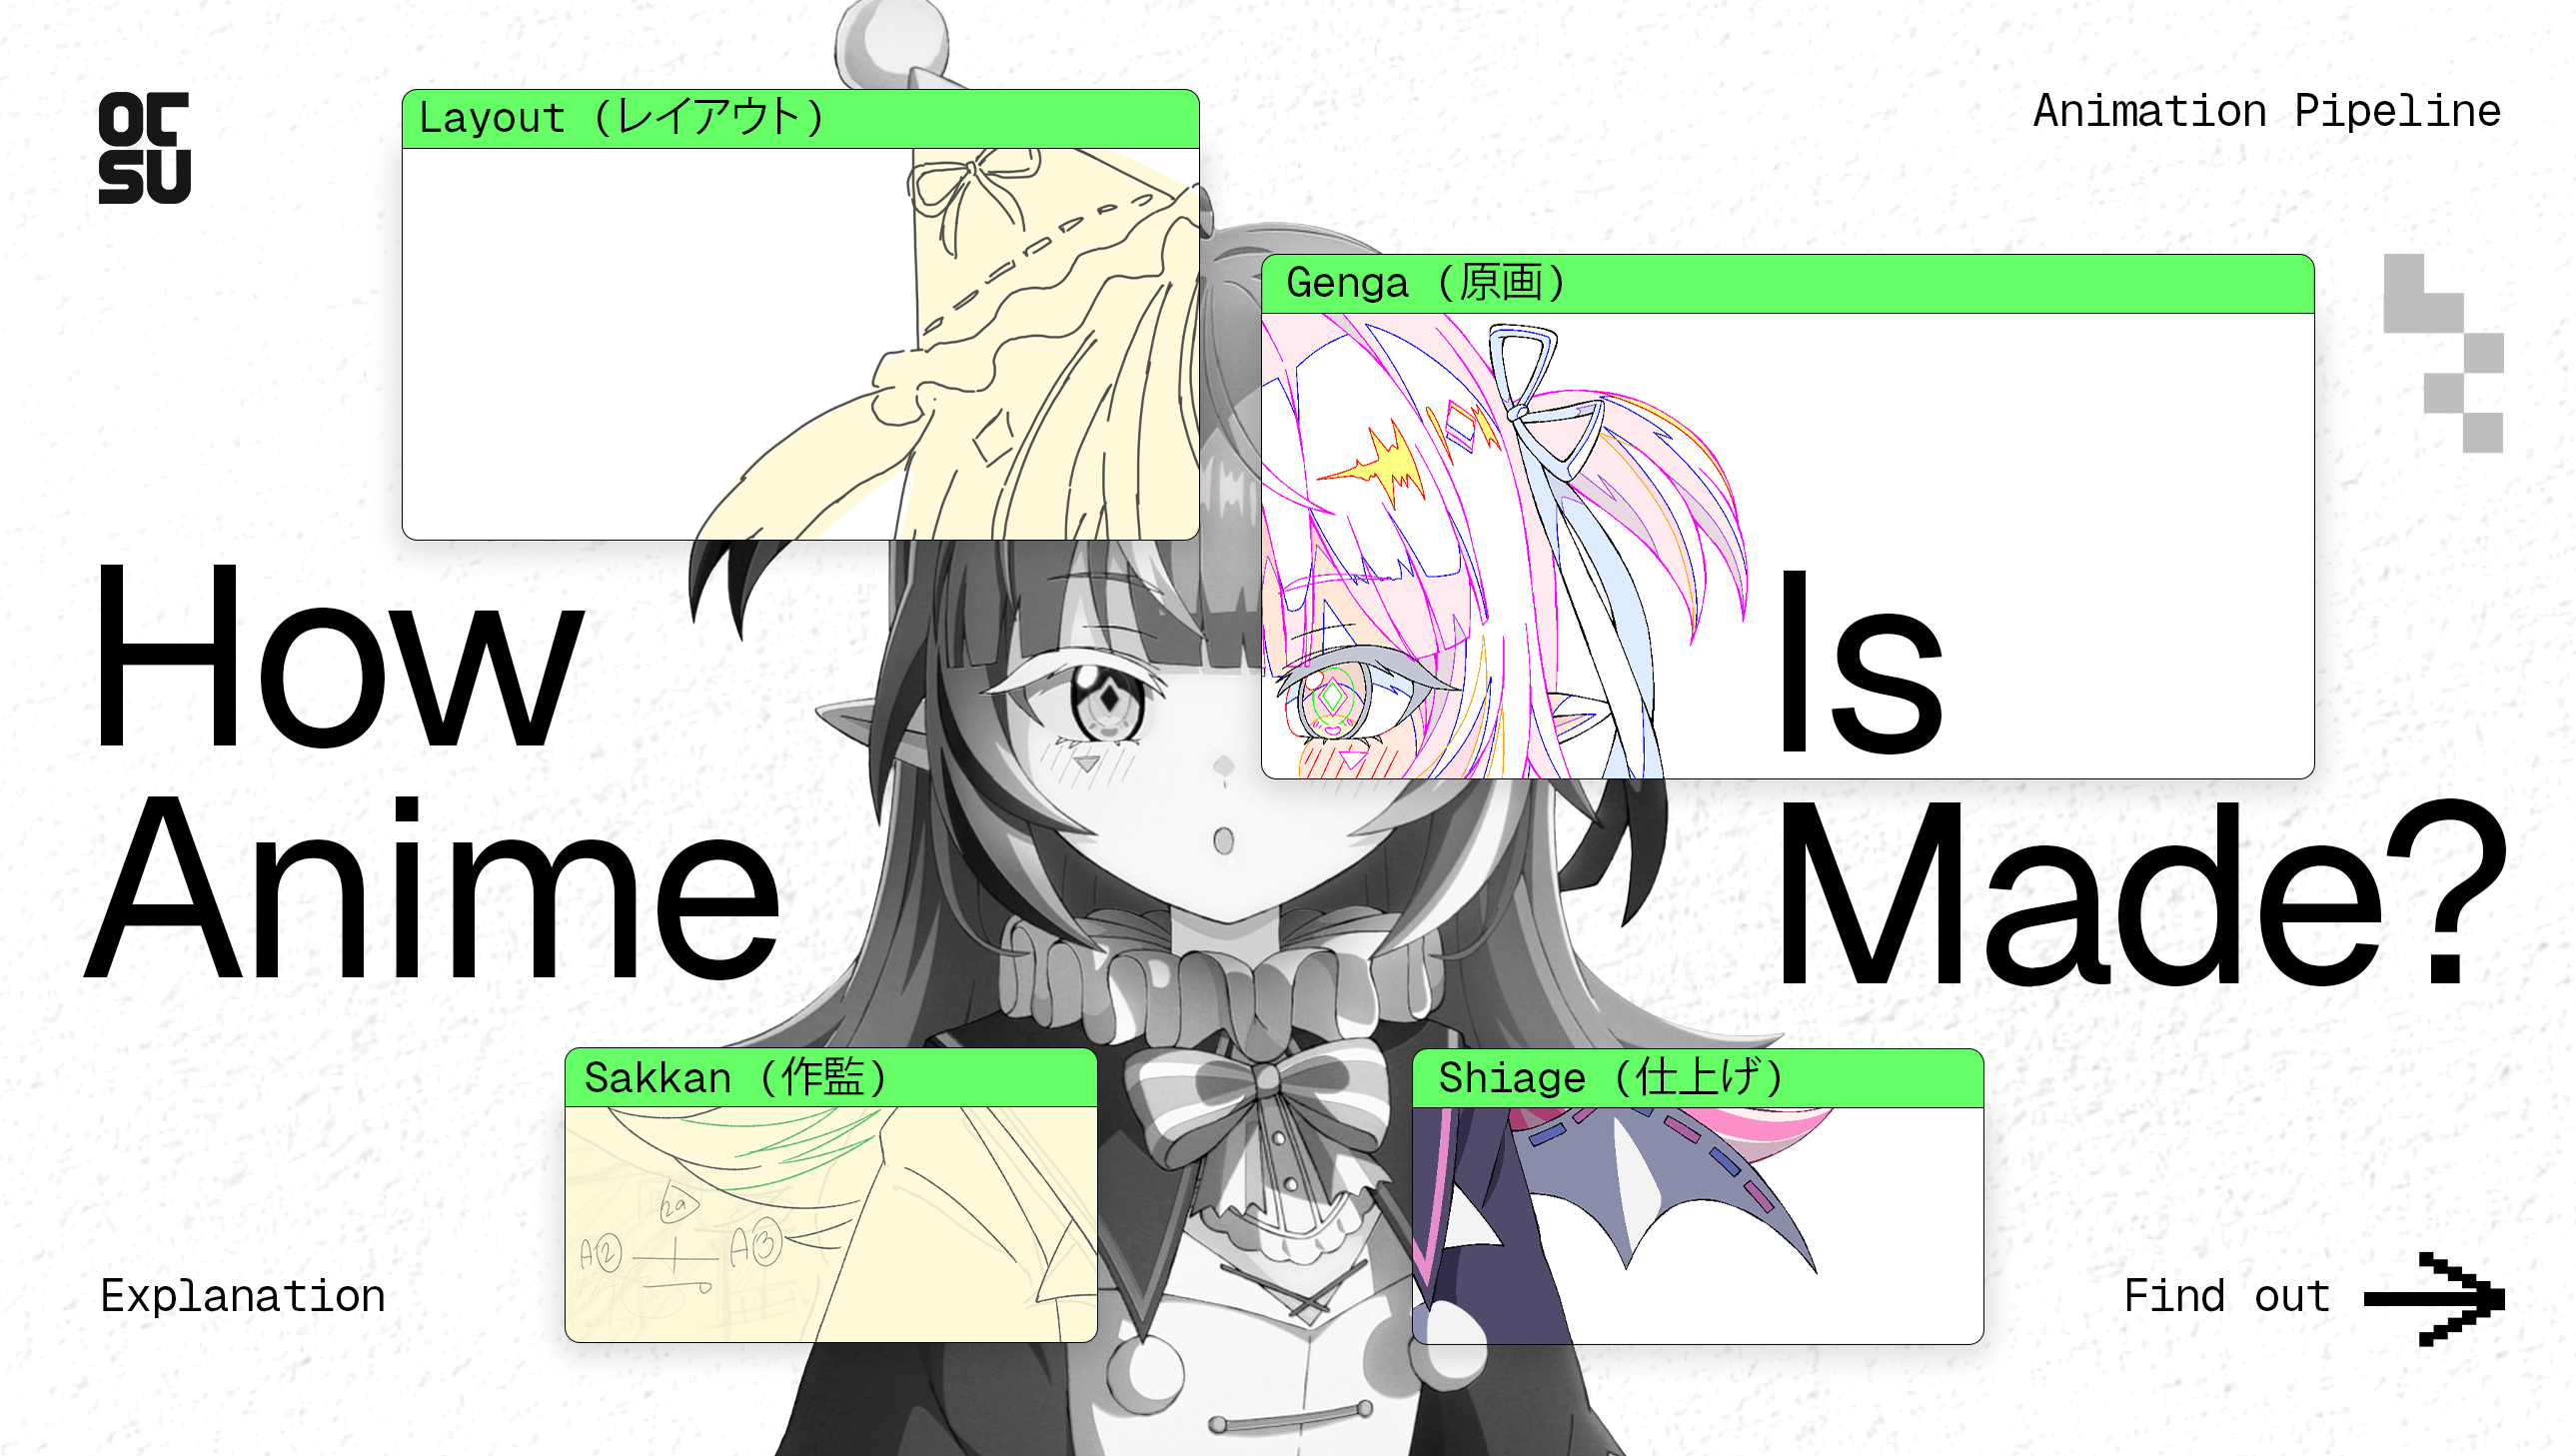
Every cut starts as a storyboard (or sometimes we build up the animation from the stillomatic/animatic). The animation director or key animators draw it rough and fast to plan the whole animation later.
Then the layout artist will take that rough idea and make it real - with actual perspective, camera position, spatial relationships between character and background. This is where the cinematic logic of a cut gets locked in.
- What gets lost: the raw looseness of the storyboard. That quick, instinctive energy the director drew in 30secs can get standardized into something more technically correct but slightly colder.
- What gets added: reality. An idea sketch becomes a clear blueprint. Characters in space. Camera with a defined point of view.
Layout is one of the most underappreciated steps in the pipeline. In many productions, the entire mood of a scene gets decided here. Neither in the editing room nor storyboard, but in these pencil lines most viewers will never know existed.
2. Enshutsu (演出)
Before reaching the key animators, layouts are reviewed by the animation/episode director (Enshutsu). They check every cut, mark corrections directly on the drawings, and approve them before moving forward. Nothing proceeds without this sign-off.
- What gets lost: some of the layout artist’s original camera or spatial choices if they don’t match the director’s intent.
- What gets added: alignment. This step ensures the layout reflects the episode director’s vision and prevents problems later in production.
3. Sakkan (作監)
After the animation director checks the layout in Enshutsu, it will be passed down to animators in Sakkan to review and correct the key pose again (if any). Often the highlight and shadow areas will be finalized in this step, but they will add in some key drawings, not all.
- What add in: highlight & shadow lines
Note: Sometimes after Sakkan, we also have the COC (Correction of Correction) step - which can be called “Sousakkan” in Japanese studios. This is the final check of all the key drawings before passed down to Genga, only when the cut requires a lot of changes. This step minimizes the error to smoothen the process later.
4. Genga (原画)
At this step all the key frames, timing and spacing are already settled down. Genga animators will have to collect all the material from the previous step to clean up the lines in key frames, to make it as polished as it can.
For example, in Sakkan there are only a few key drawings that have proper highlight and shadow notes, while other drawings are still rough. That’s why in Genga those shadow areas will be properly added in. Importantly, Genga will decide the final quality of the animation.
- What gets lost: the rough, unfinished lines from Sakkan.
- What add in: clean, polished key drawings with proper highlight and shadow. The final quality benchmark for the whole cut.
5. Douga (動画)
If genga defines the important poses, douga creates everything between them, turning extremes into continuous motion. That’s why the Douga artist is also called the in-betweener. Their main job in this step is to fluid all the motions by drawing the frames between all the key frames.
- What gets lost: the animator intended notes of the note.
- What added in: The fluidity in animation.
6. Shiage (仕上げ)
Shiage literally means “finishing”, where cleaned-up lines get filled with color digitally. The Shiage artist will work from art treatment prepared by the art director to paint the frames. That specifies exactly which color fills which area, including variations for shadow, highlights and different lighting conditions across scenes.
Their job is to apply those colors accurately and keep everything consistent across every frame.
- What gets lost: those color lines in the previous step. Those lines in Douga & Genga will be replaced with proper color fill.
- What gets added: The character's actual appearance. This is the step where the cut stops looking like a work-in-progress and starts looking like the final show.
Post-production
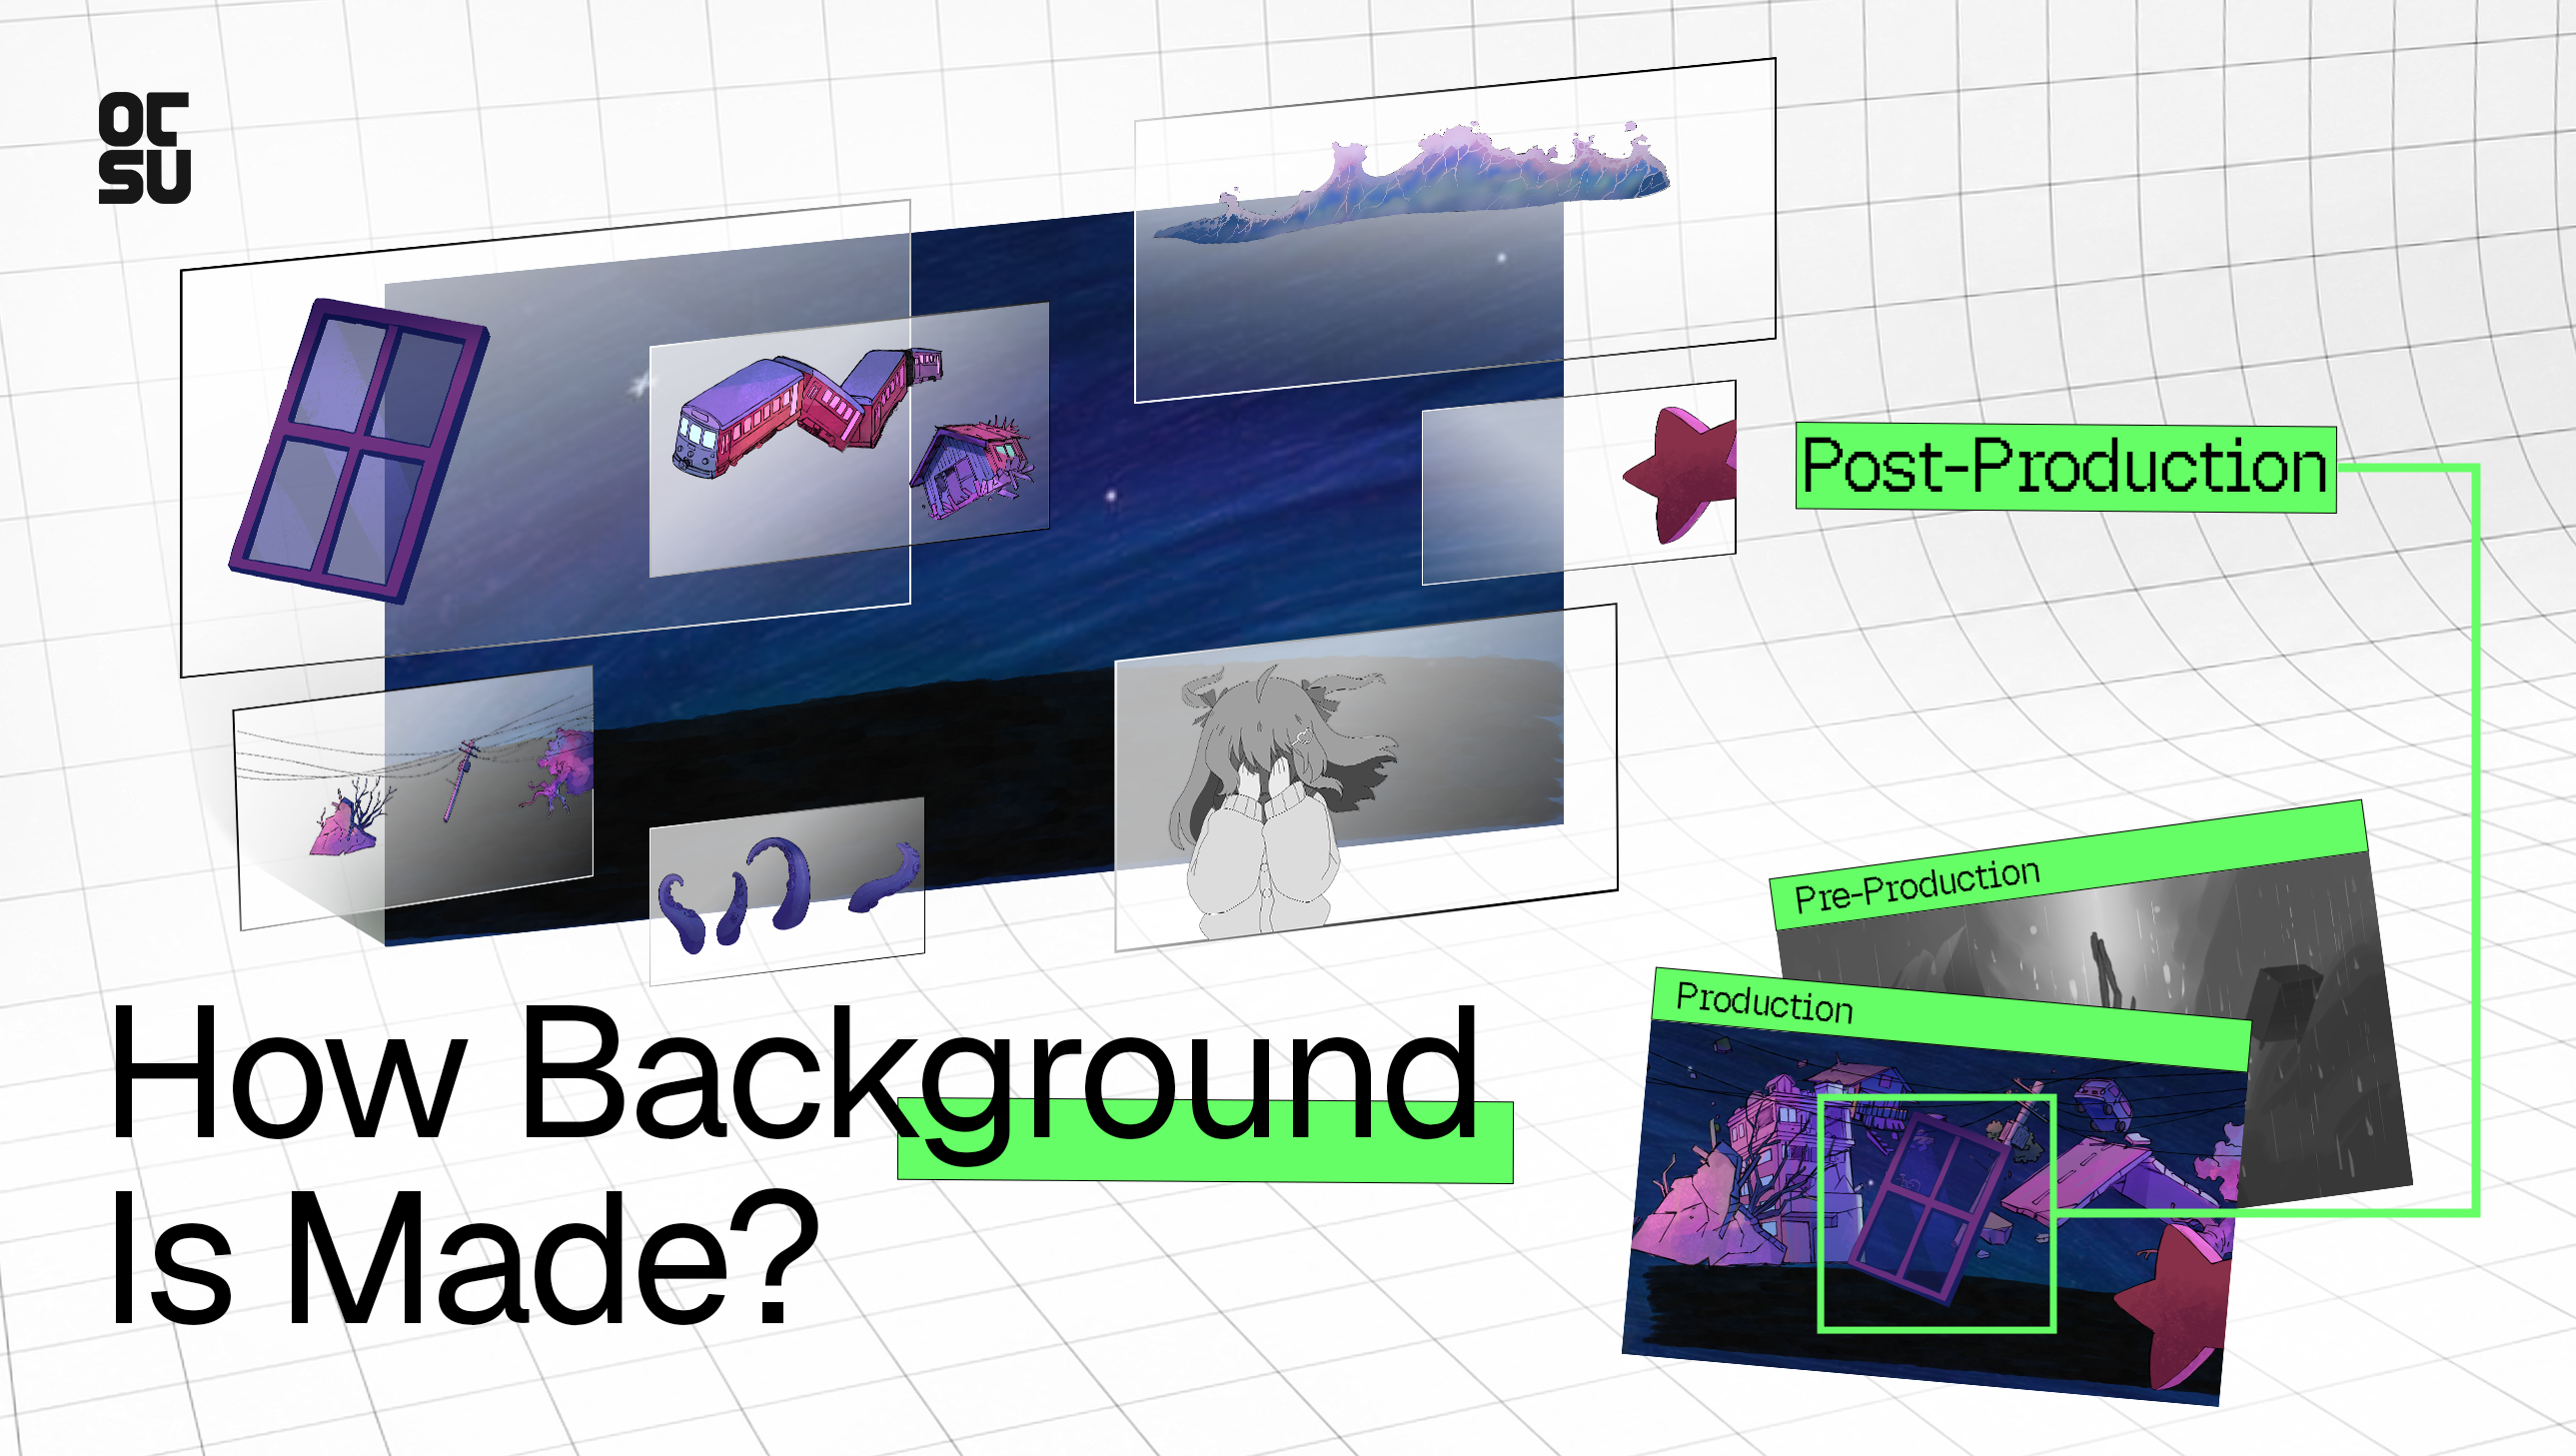
Once all the animation material moves through the production pipeline, it gets passed to the compositing team. This package usually includes shiage files, final backgrounds and any 2D VFX like light, smoke, or water.
During compositing, all these elements are layered together into a single image: character animation sits on top of the background, lighting and color correction get applied to set the mood, and special effects are blended into the scene.
Once compositing is done, the cuts move into editing, where they're assembled in sequence according to the storyboard and timing sheet. From there, sound production takes over dialogue, sound effects and background music are all added to bring the footage to life.
The final step is quality control: a full check to catch any errors before the episode is ready for delivery.
Sum Up
We’ve walked you through the full animation pipeline at Otsu Animation. This is the standard workflow we follow for most of our projects. However, every project has its own unique requirements, and we often adapt our pipeline to fit different studio workflows or specific production needs while staying focused on the overall creative goals.
Every stage requires careful thought, time and collaboration. Each decision contributes to creating a polished animation, ensuring consistency throughout the entire production process. While the pipeline may evolve from project to project, this disciplined approach is what helps us deliver high-quality results. It’s how animation has been made for decades, and it continues to bring memorable moving stories to audiences around the world.
We hope that we can answer your questions at the beginning of this animation industry. And don't worry, we still have plenty more animation topics we'd love to share, so feel free to click here to explore more.
Starting an animation project can feel overwhelming, but if you have an idea and are ready to bring it to life, we can help make that process much easier with the skills and experience we've built over the years. We'd love to hear your ideas, let's talk here.
How many stages are there in the Japanese animation pipeline?
There are 3 stages including: Pre-production - Production - Post-production.
Are Japanese and Western animation pipeline the same?
Not really. Japanese and Western animation pipeline works differently due to the roles hierarchy, frame rate style, studio's working culture and more. However, you can find some similar steps but with different way of calling if you compare these two pipeline.
Does the pipeline have to be fixed on every project?
Actually, no. As we've shared above, each studio has its own animation pipeline, and it can be adjusted to fit the project's requirements. But the fundamental steps still need to be kept to deliver good quality.